Kathy Andujo, the owner of Madre Flores, is a talented florist in the Santa Clarita Valley. She started making florals as a hobby when she took a class with her mom. She got such great feedback about her creations and loved the art form so much, she started doing bigger events. Now, her florals are in hot demand from people across So Cal.

We went live with Kathy this week on Instagram Live to get her tips on how to create a small holiday arrangement for your desk, mantel, dinner table, or another favorite spot.
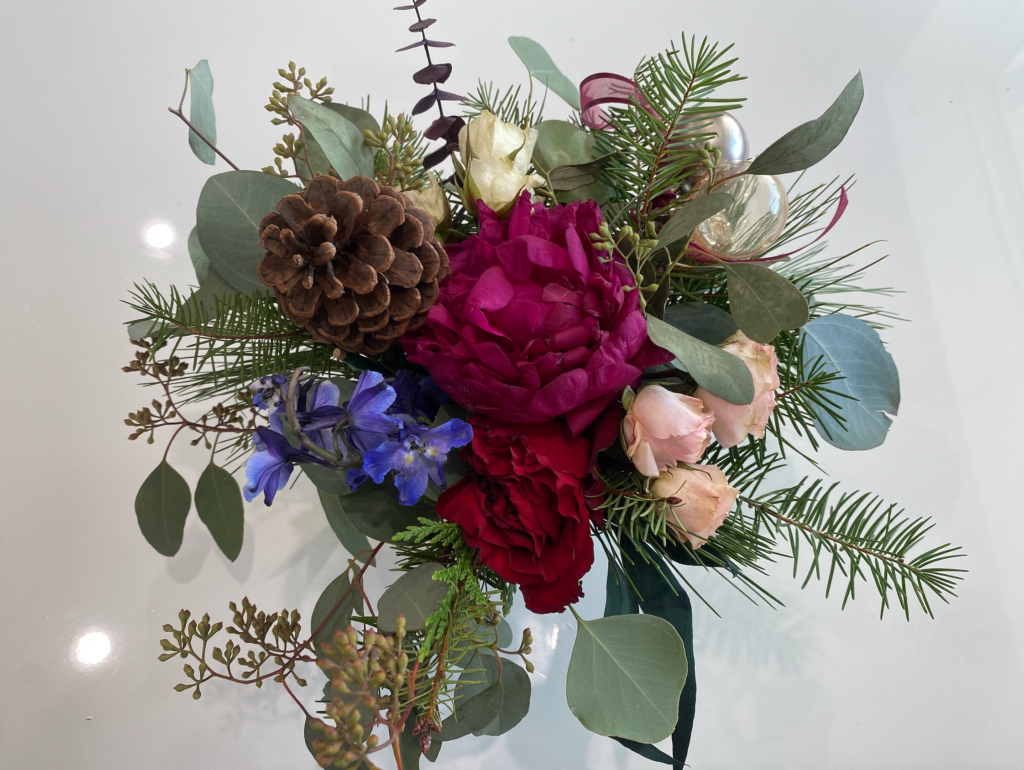
In this blog, we’ll break down her tips. But even better, we thought we’d recreate her creation!
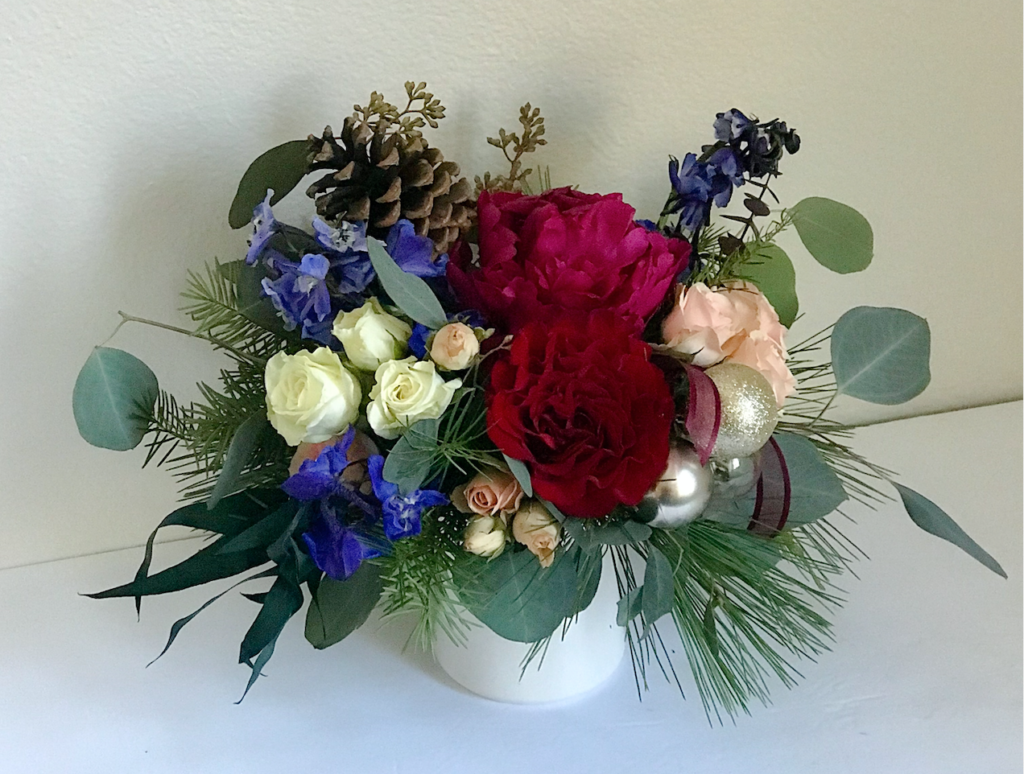
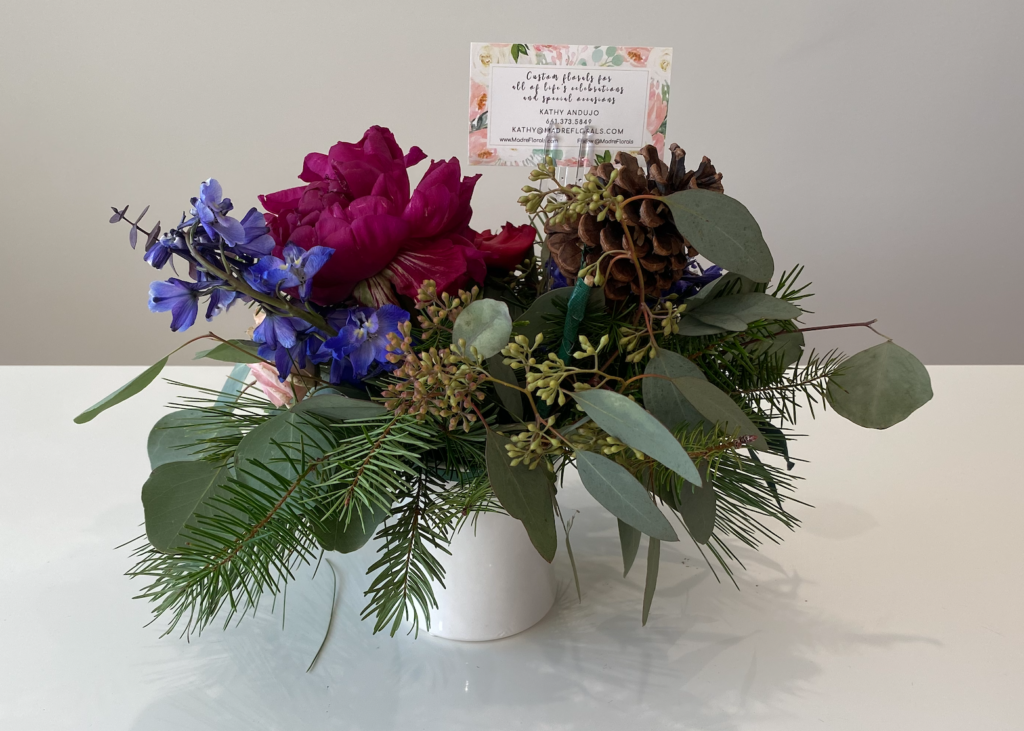
The day after the IG Live, Kathy dropped off the arrangement at Patty’s house. It was so pretty! But of course, a few days later, the flowers looked like they had seen better days.
Why not use Kathy’s tips to try to revive the arrangement, and try out Kathy’s tips?
Keep reading to see if we were able to save Kathy’s creation and help it shine again!
How to Make this Floral Arrangement
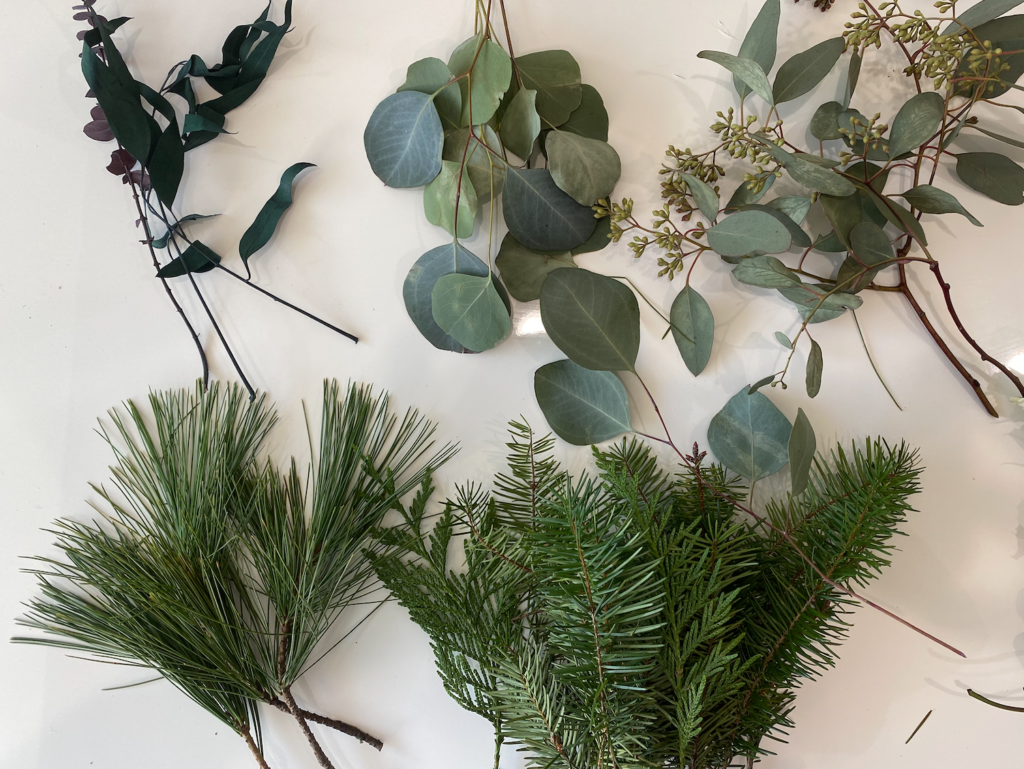
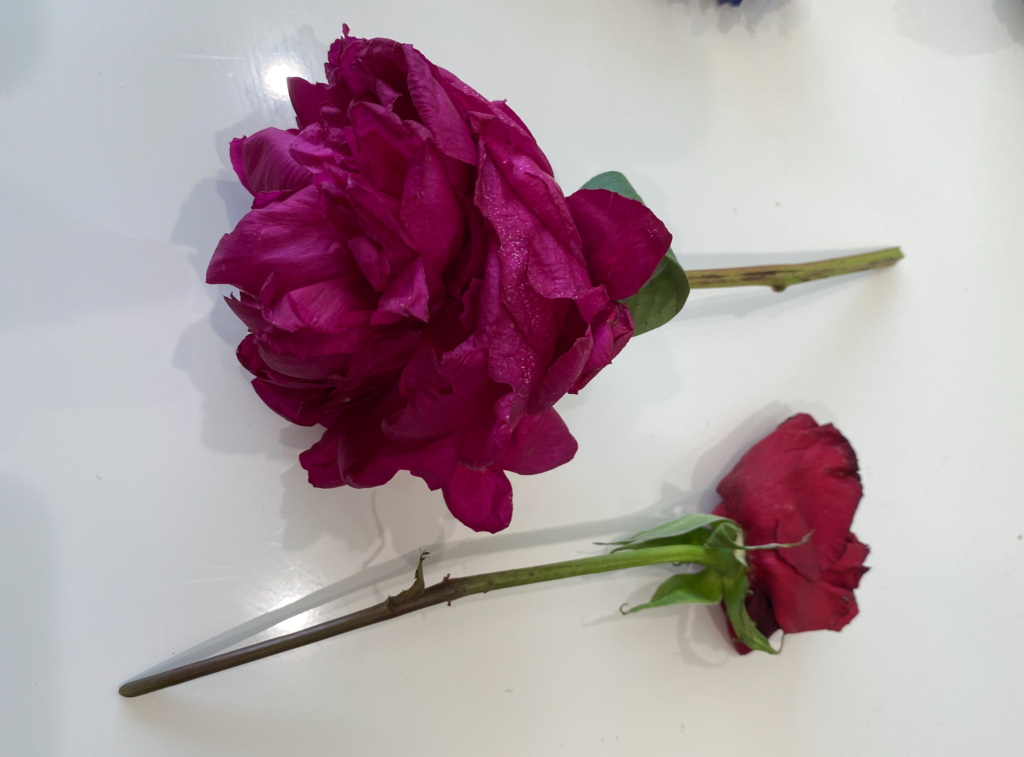
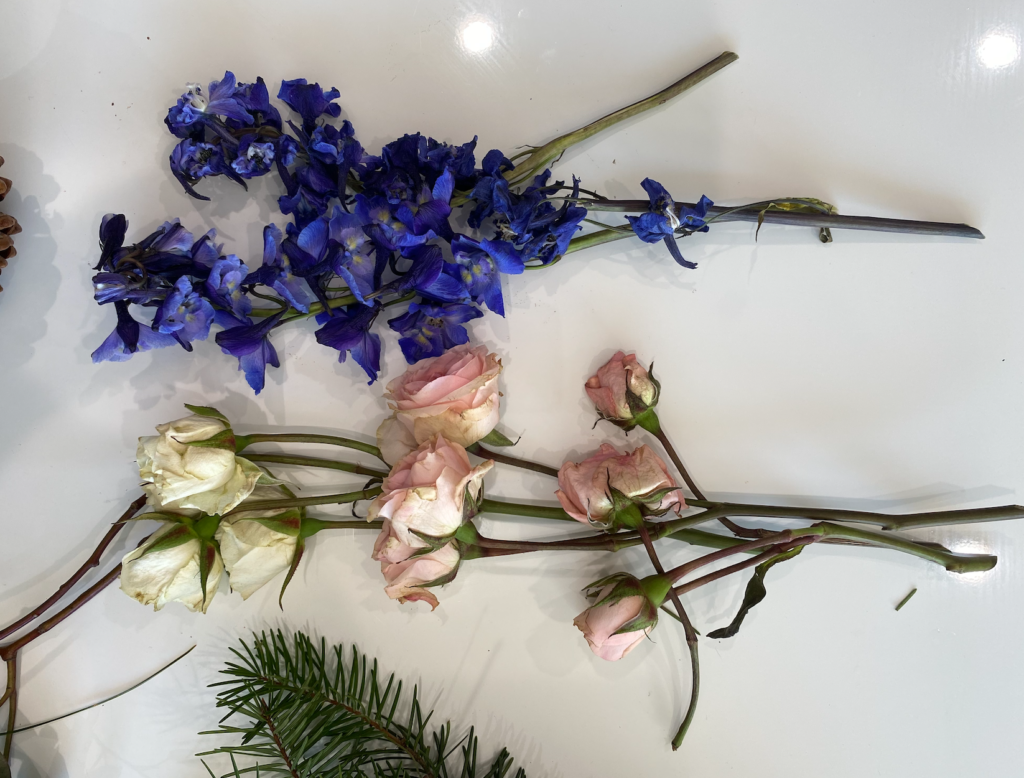
First, we took the arrangement apart to see all that was inside.
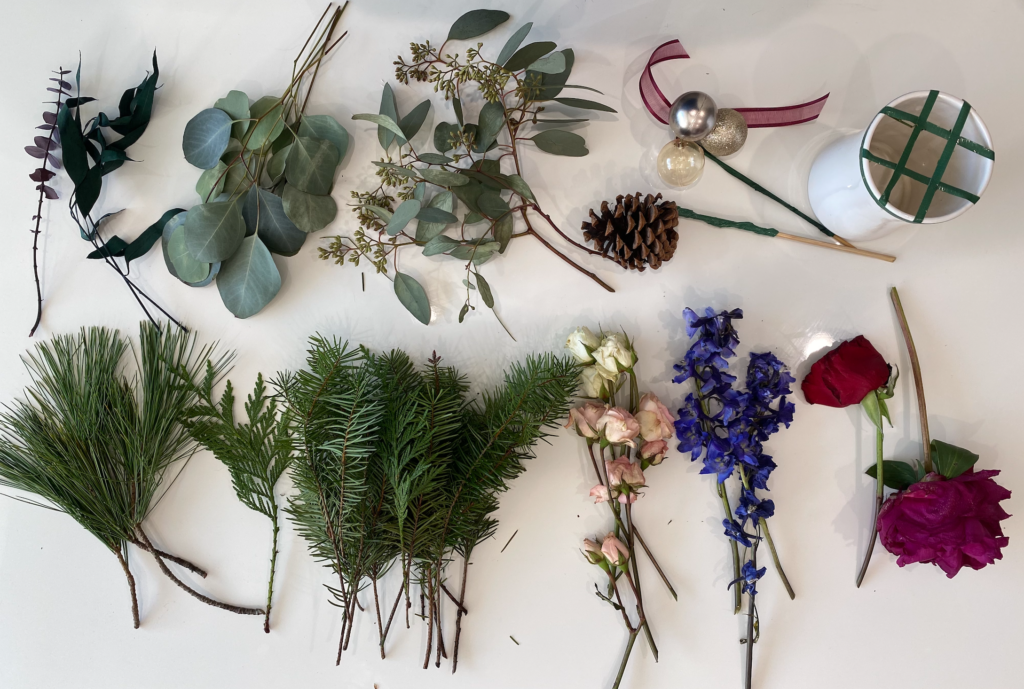
Supplies
- Vessel – vase, mug, wine glass whatever you want to use
- Floral tape in any color to make a grid across the top and a lip around the vase.
- Scissors – ergonomic ones are best. Kathy recommends you use different ones for flowers, ribbon, wire, etc. Just make sure they’re sharp
- 3 types of greenery
- 2 focal flowers
- 2 Intermediate flowers
- 2 mini flowers or fillers
- Accents like ornaments & pinecones. You should attach them to a stick with floral tape so they can stay upright in the arrangement.
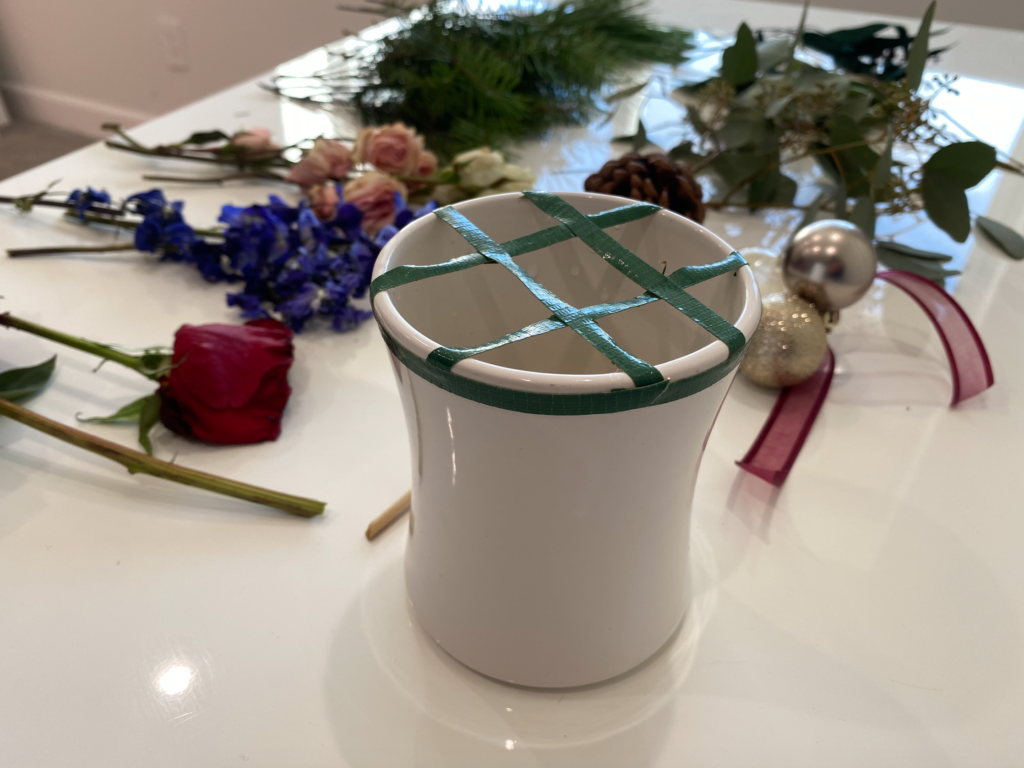
Check out the grid that Kathy recommends you create on any vessel or vase. The grid is made out of floral tape in any color. She says to make a grid across the top and a lip around the vase.
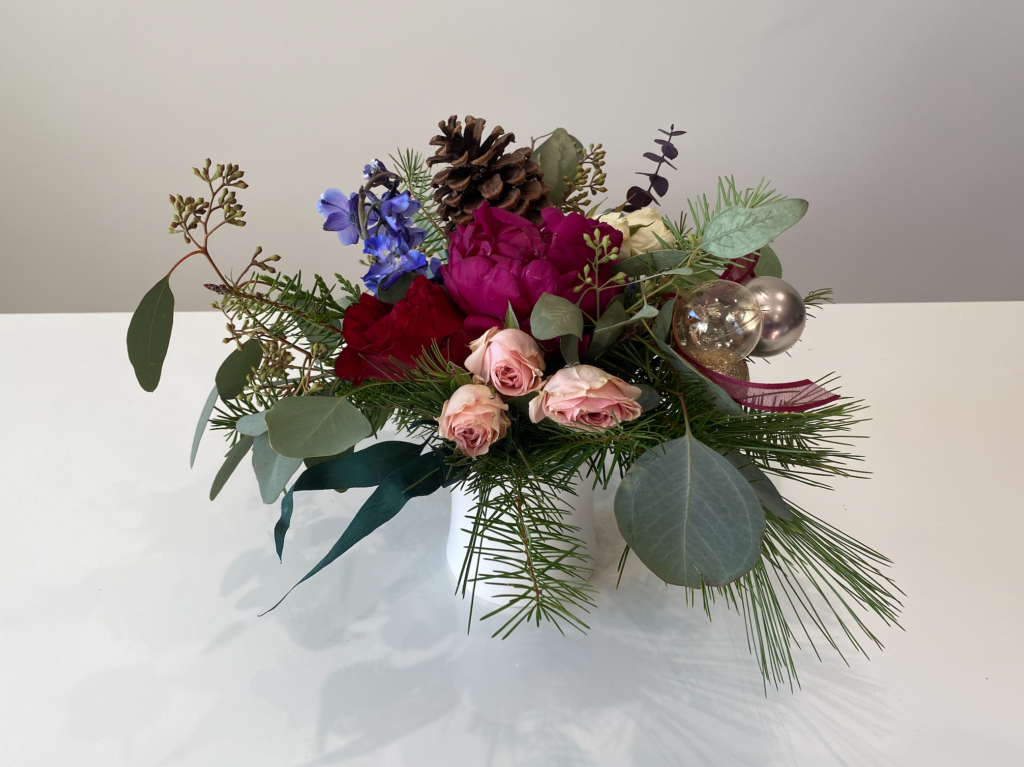
For greenery, Kathy chose Christmas tree trimmings, seeded eucalyptus, silver dollar eucalyptus, and dried greenery that’s been painted. Multiple types of greenery gives it a fresh look.
For bigger florals, you can have some fun. You can use flowers from your garden, a few blooms from the grocery store, or a few nice specialty blooms from a local florist. For this arrangement, she used a rose and a Peony.
For Intermediate and filler flowers, she likes to use garden roses and spray roses (mini roses). They are a nice filler and make a good bridge between colors. Add white between flowers to create nice transitions and separation. Delphiniums are nice to add as well and gives a pop of color.
Steps to Create your Arrangement
- Before I tried to arrange the flowers, I trimmed the stem of every flower and piece of greenery at an angel, as Kathy recommended.
- Start adding the greenery to your vessel. The greenery gives you an initial structure for your arrangement and also creates a “nest” to keep your flowers in place. The greenery also adds movement. You’ll want to use enough greenery to cover the tape.
- Add your statement flowers, giving them enough space to grow and blossom. You don’t want to add the flowers straight up. Add them as you would look at them, at an angle so you can see them.
- Add your filler flowers. This gives a nice transition in color and size.
- Add some decor in a few places to give it some interest, like the pinecones and ornanents.
- Add some textural pieces, like dried flowers, that accentuate the green and that contrast the colors.
Wa-la!
What do you think about our recreation? Not bad! What’s so surprising is that these flowers looked like they were ready for the trash. With Kathy’s tips, we were able to give the arrangement new life.
Her instructions were really helpful and we are so much more confident in creating a small arrangement. But for the big stuff, we’re still calling Kathy!
More Great Tips from Kathy:
- To force a flower to bloom, dunk it in warm water, give it a swirl upside down and let it open.
- If you’re going to put your flowers in the fridge, don’t put them where you have fresh fruit or produce; they’ll die a little sooner.
- Don’t put too much water in the vase, only fill it to about a 1/3 of the way up. If the stems get too much water, it makes the water yucky faster.
- Pull out the flowers daily and give a little snip. Then put them back and they will last much longer.
- If you only want to see the arrangement on one side, like on a nightstand, it’s ok to create it so it only looks good on one side. If you plan to use it as a centerpiece or on a coffee table, you’ll need to fill it all the way around.
We can’t wait to see all of your floral creations! Let us know if you give this a try, we’d love to see how they turn out.
